

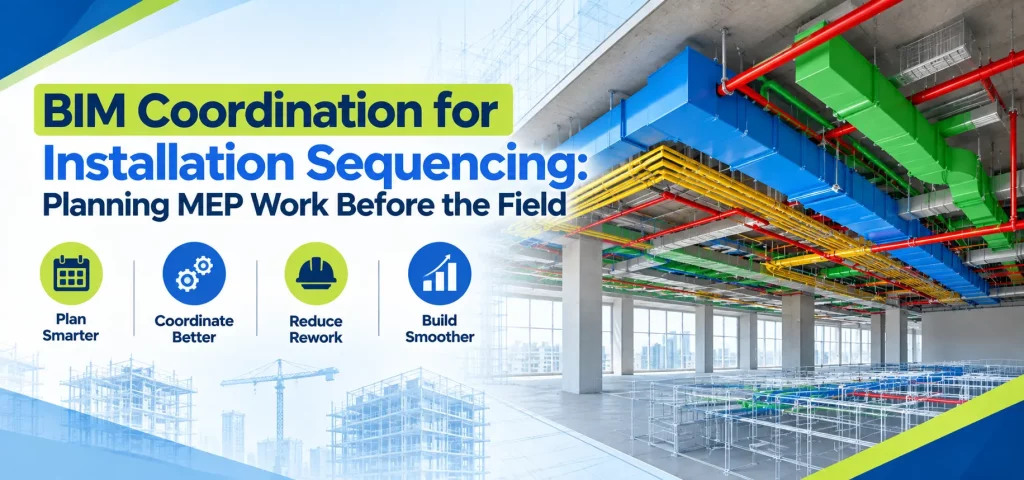
Picture the ceiling of an office building’s mechanical room. All these HVAC ducts, plumbing branch pipes, fire protection pipes, cable trays, and electrical conduits all need to fit within the eighteen inches above the grid. Theoretically, none of them intersect. Practically, the sequence of installation is just as crucial as any intersection problem.
That part of coordination often gets skipped over. A model can confirm a duct, a pipe, and a cable tray all fit in the same zone, but if the duct crew shows up last, there may be no room left to maneuver rigid ductwork past hangers and supports already in place. This is where MEPF installation planning matters as much as clash resolution — figuring out what needs to go in first, not just what fits.
Also Read: How Shop Drawings Help Contractors Before Construction Begins
Prior to any tool being utilized, the team can take the coordinated process model for a walk and discuss sequencing rather than conflicts. It is a common practice among many contractors to hire specific BIM coordination services at this point to look into issues of routing, access, and installation sequence in all MEP trades.
That kind of review changes the conversation on site. Instead of foremen working out sequencing on the fly under schedule pressure, trades arrive with a shared understanding of what goes in first, second, and third — and why.
A coordinated model built through accurate 3D BIM Modeling makes this possible, since every trade sees the same ceiling cavity at once. Firms offering BIM Coordination services build these models so routing and access can be reviewed together, not trade by trade.
Why MEPF Installation Sequencing Matters
The trades battle for the same physical space and frequently even for the same time slot in the schedule. A big duct installed prior to the installation of small service lines will prevent access that the plumber or electrician will need in the future. The main pipes for plumbing are typically installed prior to the branches, the cable trays require access to pull in the cable after other structures have been erected above them, and the fire protection piping has to coordinate with the ceiling grid.
How BIM Coordination Supports MEPF Installation Planning
A coordinated model isn’t only useful for flagging where two systems intersect. Used well, it’s a way to study the real installation environment before anyone shows up with material — available space, routing options, access, and where ceiling zones are getting congested. The question shifts from “do these systems clash?” to “how do we actually build this?” Trade interfaces are easier to spot when the whole team looks at one federated model instead of separate discipline drawings.
Using 3D BIM Modeling to Visualize Installation Constraints
3D BIM Modeling lets teams see spatial relationships that are hard to judge from 2D drawings alone — duct dimensions next to structural beams, pipe routes near cable trays, clearances needed for maintenance. In a congested ceiling above a corridor, seeing everything together makes it obvious which system needs to go in first, simply because of its size and rigidity. Smaller, flexible systems can usually work around what’s already installed; large rigid ductwork generally can’t.
From Coordination to Installation Sequence
A practical workflow looks like this: model the systems, coordinate them, identify constraints that affect buildability, decide on a sequence, communicate it to the trades, install, then verify against the model. Skipping the “decide sequence” step is common — teams coordinate for clashes, call it done, and leave sequencing to whoever shows up first. This is really what MEPF BIM Coordination is about — getting every trade talking about order and access before ductwork gets fabricated.
| MEPF Element | Possible Installation Consideration | Why Sequence Matters |
|---|---|---|
| HVAC Ducts | Large ducts may require early access | They can occupy significant ceiling space |
| Plumbing Pipes | Main lines may need to be installed before branches | Later access can become restricted |
| Cable Trays | Routing may depend on available overhead space | Other services can obstruct access |
| Fire Protection | Pipe routes need coordination with other services | Ceiling installation can affect access |
| Equipment | May require clear delivery and installation paths | Later installation can become difficult |
How BIM Coordination Helps Avoid Installation Problems
Coordinated models can flag constraints well before crews reach the field — a duct route that leaves no room for a sprinkler branch, equipment with no delivery path once walls close in, a tray that becomes inaccessible once ductwork is hung. Catching these on screen is far cheaper than catching them with material already on site. Not every field problem disappears, though; existing conditions and site-specific issues still show up, and good MEPF installation planning simply reduces the avoidable ones.
MEPF BIM Services and Pre-Construction Planning
MEPF BIM Services support project teams well before the first pipe is threaded or duct is hung, letting them visualize systems together, review routing across disciplines, and coordinate trades around a shared plan. Used properly during pre-construction, this kind of MEPF installation planning turns individual trade decisions into one build strategy everyone has agreed to in advance.
What Installation Teams Can Learn From a Coordinated BIM Model
Field crews reviewing a coordinated 3D BIM modeling before mobilizing can see where systems are routed, which trades occupy priority space in tight zones, and where access has been deliberately preserved. They can see which coordination decisions have already been made, rather than re-litigating them on site, and which congested areas deserve a closer look before work starts there.
BIM Does Not Automatically Create the Perfect Installation Sequence
A coordinated model supports planning, but it doesn’t make the final call. Site conditions change, labor availability shifts, material deliveries slip, and safety or equipment needs can force a different order than the one that was planned. The model gives teams a strong starting point and a shared reference — the people running the job still have to adapt it to real conditions.
Practical Steps for Smoother MEPF Installation Sequencing
Getting real value out of MEPF installation planning usually comes down to a handful of habits rather than any single tool:
- Coordinate all relevant disciplines before field installation begins.
- Identify congested areas early.
- Review large, difficult-to-install systems first.
- Consider access requirements for tools and people.
- Coordinate equipment delivery paths before ceilings close in.
- Review trade dependencies so no one installs into a dead end.
- Communicate the planned sequence to every subcontractor.
- Update the model whenever approved changes occur.
- Verify coordinated information against current construction documents.
The value of this kind of planning shows up in small ways on site — fewer arguments about whose system goes first, less rework when a crew finds their zone occupied, and a clearer answer when someone asks why the sequence is what it is.
Also Read: The Role of Plumbing Systems in MEPF BIM Coordination
Conclusion
BIM coordination isn’t only about catching where systems physically collide. Used well, it also helps project teams work through how MEPF systems will actually be installed in the field, and in what order. When these aspects are considered together in advance, then the crew comes to the field with an installation plan that was discussed in advance instead of being made on-the-spot. It will not eliminate all problems in the field but it will make sure that fewer problems are caused by improper planning.